


Homemade shrinky dinks
 As a child, I have very fond memories of making shrinky dinks. You could buy them as a kit and colour them in, put them in the oven and they would shrink down amazingly! I used to be fascinated watching them. For my girls craft birthday party, they made shrinky dinks too and loved it, so I thought, how about a homemade version.
What you need for homemade shrinky dinks:
- Plastic – you need recyclable plastic, the foamy sort is good or ones with recycle number 5 or 6. I used the tray a pizza came on and a tub of liquitabs
- Permanent markers
- Scissors
- Foil
- Baking tray
- Cornflour
How to make shrinky dinks:
- Cut the plastic to the shape you want. You need it to be fairly large as it will shrink down.
- Colour or draw whatever you want on the plastic with permanent markers.
- Place your finished plastic on a baking tray with foil on, sprinkled with a little corn flour.
- Put it in the oven at 180 degrees for approximately 1-3 mins. You have to watch it, for when you think it’s done, as all plastic and sizes take a slightly different length of time.
- When you have removed it from the oven, you may need to flatten it while it’s still hot (carefully please, I don’t want any burns), as it does sometimes curl.
Hand shrinky dinks
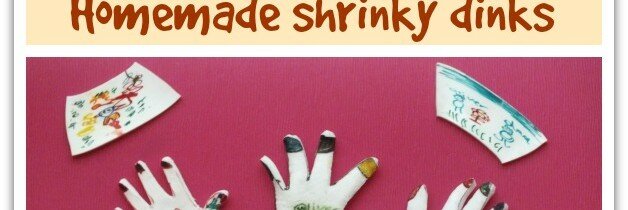
We thought it would be nice to make shrinky dinks of our hands, so Nana drew round each of the children’s hands onto the foamy plastic (from our pizza base packaging), using permanent markers.
Next, they all got colouring and decorating their hands. They loved drawing on and painting their nails. They added a watch on and BB wrote his name.
 Once, they were all satisfied with their hands, we cut them out.
 We placed the hands on foil sprinkled with cornflour, onto a baking tray and put them in the oven for approx 2 mins.
The children loved watching them shrink in the oven. It was so fascinating to watch. They got quite excited, especially when they started curling up.

Once they appeared to stop shrinking, we took them out and carefully tried to flatten them.

I think they look quite good. The children thought they were fantastic, so we took a photo of their shrinky dink hand next to their own hand to show how much the plastic shrunk.

We all enjoyed making these, so we thought we’d have a try at some more with a different type of plastic. The children drew pictures and we shrank them in the oven. Here’s how we got on:
Some of the plastic worked better than others, some curled more than others, but we all had fun trying. It was definitely a fantastic activity to experiment with and the children loved seeing how the plastic from our disposable/recycled packaging shrank when heated.
I think these shrinky dinks would make great key rings or maybe a book mark.
What do you think?

HH




I never knew plastic shrunk in the oven!! What a great easy thing to do at home x
It is very quick and easy
Brilliant! Proper nostagia for mums and fun for kids to. What’s not to love?
They were great to do (and yes, I loved it too)!
Great fun isn’t it. Our kids love shrinking crisp packets, give it a go!
Yes, I remember that as a child, I was going to do that with them as a simple science experiment soon
that looks like fun. i had no idea plastic would shrink link that! #letkidsbekids
It is great to watch!
How kool are they
Thanks
Brilliant idea! I’d never have thought in a million years to do an activity like this.
Give it a go, the kids love it
Oh yes, these look fun! I remember shrinking crisp packets when I was younger, and loved doing that!
It is fascinating shrinking things!
woah this is FANTASTIC!! Can’t wait to do this with Carson!
carsonsmummy.blogspot.co.uk #letkidsbekids
Thanks, I hope you have fun
I love it! I can make some and send home (Philippines) in the post =) #letkidsbekids
Yes, fantastic idea!
Every week Karen you amaze me with your craft ideas. Brilliant!
Thank you x
Love the idea of decorating their own hands, Princess is desperate to have her nails painted so this would be a great way for her to do it! Good excuse to have pizza too, I will be trying this! #LetKidsBeKids
Brilliant, I hope you have fun
This is brilliant!! I used to love that stuff too Thanks for linking with Tuesday Tutorials #pintorials
Thanks
Aaah- those little hands look so sweet- the real ones as well as the shrinky-dinks! We’ve done crisp packets but shrinking something you can design and decorate yourself looks extra good fun.
It was good fun
I’ve never heard of these before – they look great!
Thanks
I used to buy those as a child! I never knew you could make your own, what a great idea.
Thanks
I have never heard of these before – what a great idea. Thank you for linking up with the Kids Coop
Thank you